
Do you want to create an Invoice and send it to your customers?
Creating and sending invoices is essential for most business owners as well as freelancers or website creators.
In this given way, you can just use one WordPress plugin to create and send invoices to your customers in their email addresses. Also, you can track the payment very easily using this plugin.
In this article, we will show you how you can create invoices for your clients in WordPress step by step.
Installing the plugin “GetPaid | WordPress Payments Plugin“.
Install this plugin on your Website using the plugin upload option. If you are not familiar with the plugin installation process, here is the instruction on how to install a plugin in WordPress.
After installing the plugin, Activate it by clicking on the activate button.
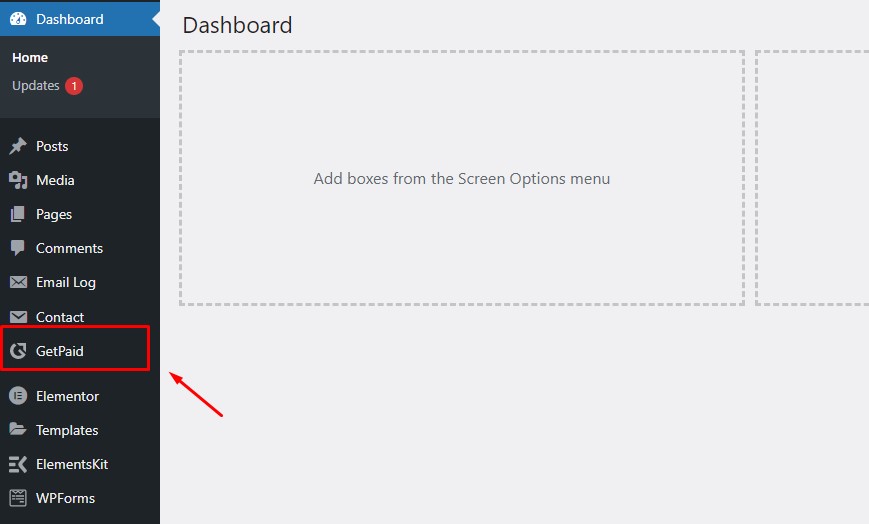
Once installation and activation are complete, you will see a new menu item is added to your WordPress dashboard called “GetPaid”.
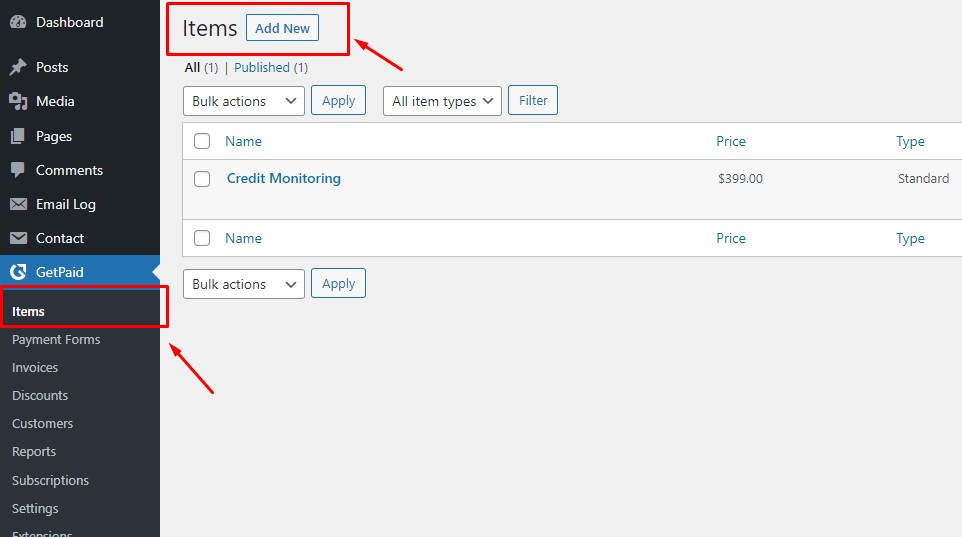
To create an invoice for your services as a service charge, you have to create a service first. To create a service, Go to the GetPaid->Items section. From there, Click on Add New button for adding a new service.
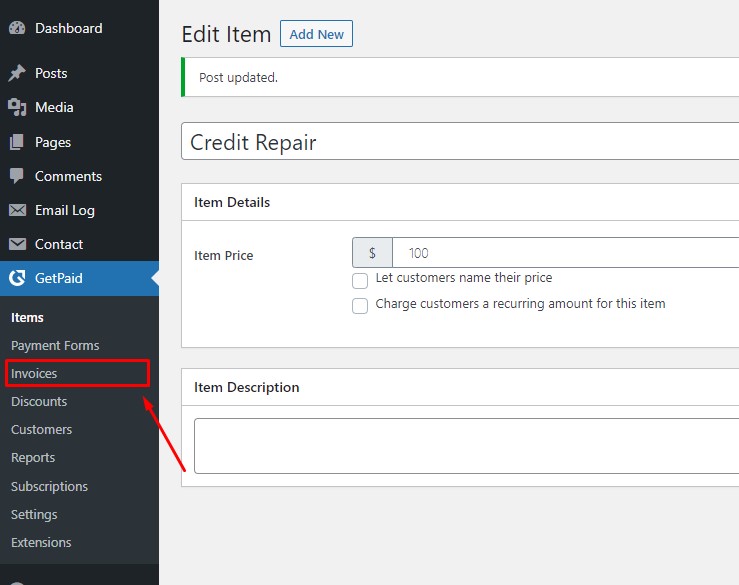
Now simply add your service Title, Price, and Item description.
If you want your users to pay a recurring amount, check the checkbox and fill in the necessary info.

Click on the publish button.
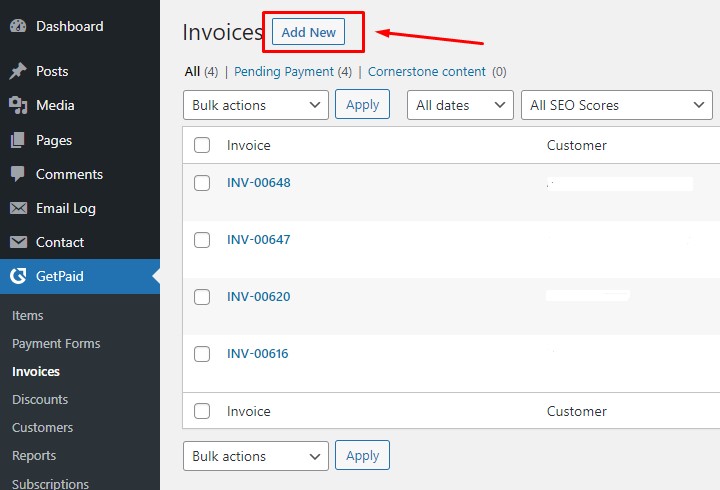
Now, go to the Invoices option from GetPaid->Invoices
To create a new Invoice for your customer, click on the Add New button.
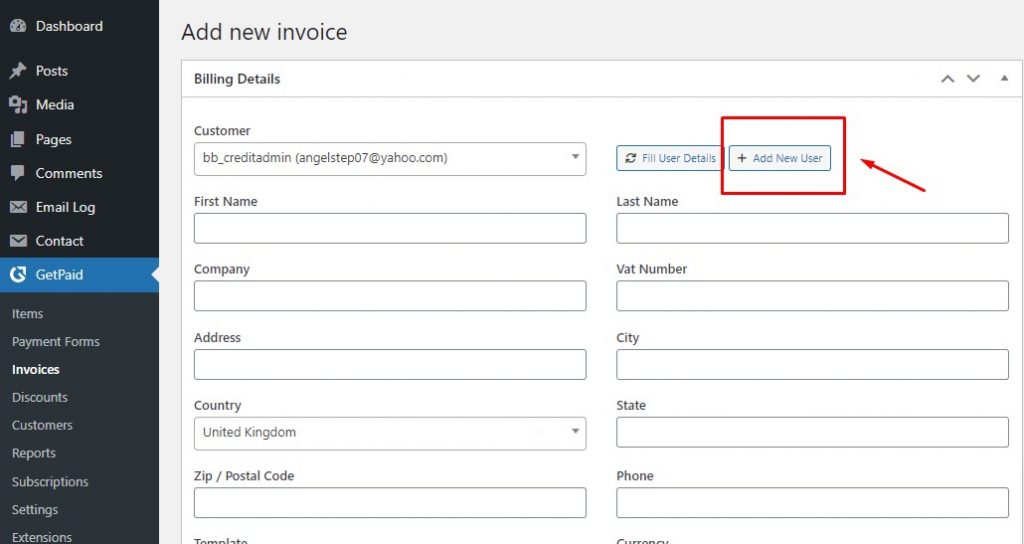
From the Billing Details section, you can create a new client on your website or add an existing customer. To create a new customer using their email address, click on the “Add New User” button and fill in all the necessary information like Email, Name, company, etc. When everything is okay for adding a new user, just hit the Enter button from your keyboard.
Now, add the user to the Billing details section.
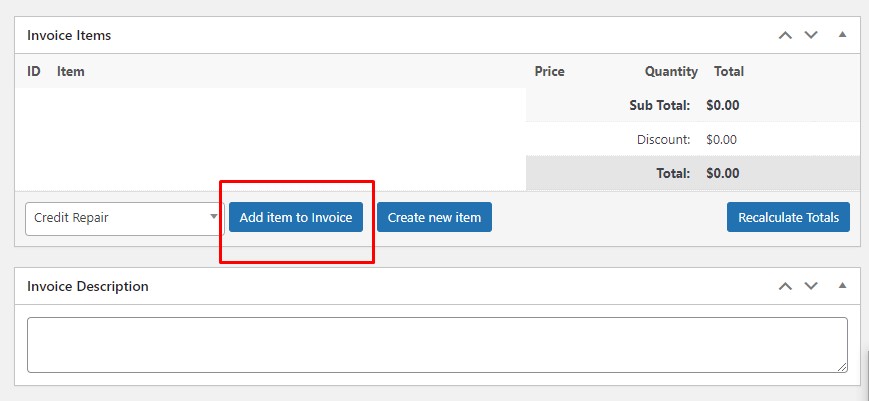
From the Invoice Items, Add your service item there and click on Add item to Invoice button.
Make sure to check this box if you want to send an invoice instantly.
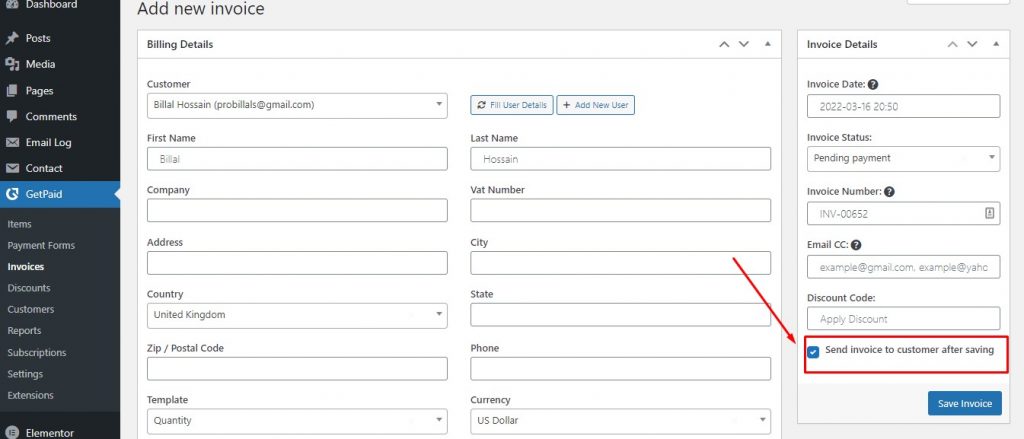
After everything is complete, click on the “Save Invoice” button.
As soon as you click on the Save Invoice button, The user will receive an Email for this invoice. They will simply click on the View or Pay link to pay for this invoice.
Now, you have to set up a payment gateway for receiving payments. GetPaid plugin supports Authorize.net, Bank Transfer, PayPal Standard, and WorldPay Payment gateway by default. But if you want to use another gateway, you can contact them directly from their website https://wpgetpaid.com
We will show you how to setup Authorize.net payment gateway.
To setup a payment gateway, Go to GetPaid->Settings->Payment gateways.
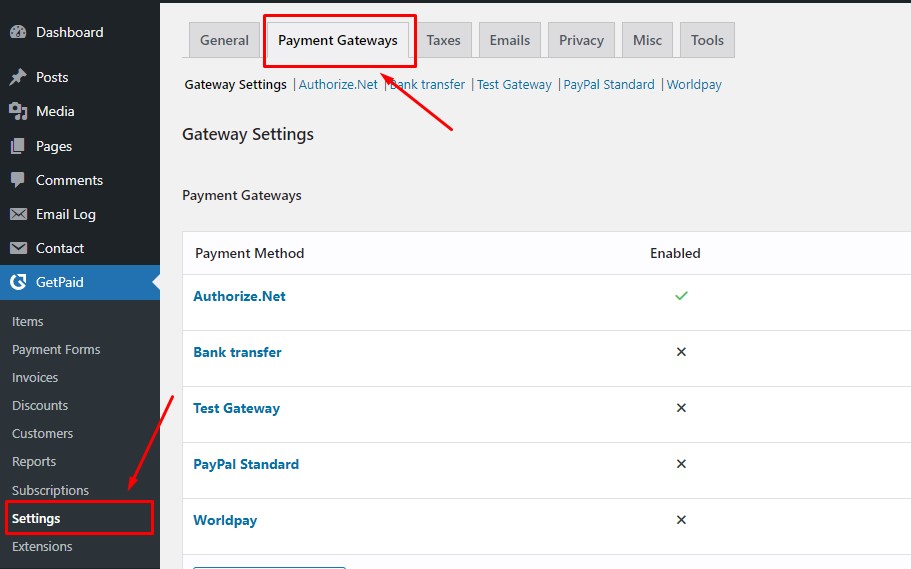
Click on the “Manage” button

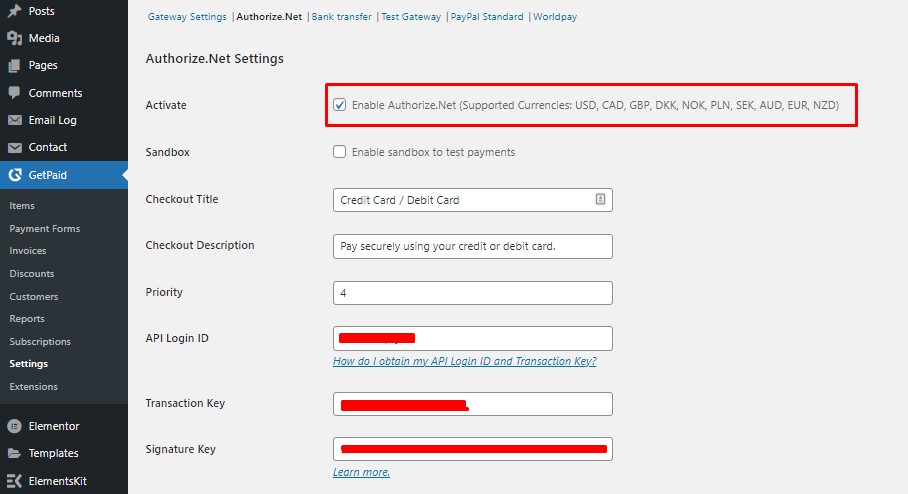
Click on the Activate checkbox to activate Authorize.net payment gateway. You can also enable Sandbox mode to test payments.
From here, you have to enter the API Login ID, Transaction Key, and Signature Key from your authorize.net account and click on the Save button.
And you are ready to go now.
You can now check the payment system by sending a test invoice yourself. If you have an issue with receiving the invoice as a user, there is something wrong with your server email function.
For further assistance, you can reach us Here.


Very good write-up. I absolutely appreciate this site. Thanks!
Your appreciation means a lot.
Great delivery. Solid arguments. Keep up the good spirit.
Muchos Gracias for your article.Really thank you! Cool.
Thank you ever so for you blog. Really looking forward to read more.
Major thanks for the article post. Much thanks again.